Graphic Fandom Art-Doctor Who

Those of you who are hoping for bow tie themed or something featuring fish fingers and custard are about to be disappointed. I love Ten and Eleven as much as the next gal but when I think of The Doctor, I think of jelly babies, K9 and very long, multicolored scarves.

Number Four is my Doctor.


Tom-Baker-source_nerdist
Ah…Tom Baker! (that’s his face when he saw my finished project-sorry Tom.)

Brings back memories of sitting on the living room floor with my brothers waiting for the weekly episode to start…”woo-eee-ooo”

Yah, I’m old.

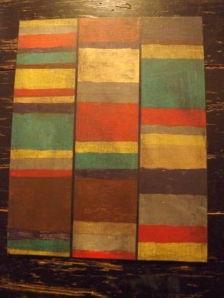
I knew that I wanted to recreate the scarf in some form.  Since these projects are supposed to be very simple, almost to the point of only being understood by someone “in the know”, I knew the color sequence would be the key. Of course while I was at the store I forgot my color list. The one I looked at on my phone called for mustard, bronze, camel, grey, rust, purple and green.  I got all those colors only to realize when I compared them to the real scarf that they were too bright by a mile.

Since when has inaccuracy stopped me?

Onward!

The pattern I used was the Official BBC pattern on androgums.org. I used the first one.

The method to my madness was this:

First I divided my canvas into three columns. Then I took the length of the canvas, multiplied it my 3. Then I added up the total of rows in the pattern, divided the number of inches by the number of rows and got a measurement for each row. While laying out the rows I multiplied the row measurement by the number of rows for that color and marked it off. I then labeled each section with a dot of color.

DSCF0639

Sound like a good plan doesn’t it? Well, my math must have been off because when I got to the end of my third row I still had several rows left to do. At that point I improvised, by which I mean I went rogue and made the last few rows the way I wanted them to look.

I figured that if I had the colors wrong I didn’t need the pattern to be exact, right?

OK. time to fill those suckers in!

DSCF0639

This process was not with issues (you are shocked I know). Even though I had paint pens, it was very hard to stay in the lines. Plus I had to use regular paint for the purple and I couldn’t get good coverage. Then I smudged the not yet dry paint in a couple of spots.

DSCF0641

I covered a lot of the rough edges by drawing black lines between the columns, and that neatened it up a bit, but I was decidedly “meh” about the project at this point.

I decided to clean up the outer edges by painting them charcoal. Then I got the idea to tone down the bright colors by color washing the whole canvas with the same charcoal color. I also turned it so it’s portrait rather than landscape.

DSCF0642

I like it sooo much better now 🙂  The colors are much closer and the color wash hides my smudges and any pencil line that were showing through the lighter colors.

Tom Baker might not approve, but I do 🙂

Bird Food Cookies

One of our family traditions is that when we take our tree down we put it in the yad and decorated it for the birds. In the past that has consisted mostly of suet and those peanut butter and bird seed covered pine cones with a few hanging fruit slices and maybe a popcorn and dried fruit garland.

This year we decided to branch out a little.

I have tried in the past to make bird food ornaments for the tree but they always fell apart. I hit Pinterest and found out what I was missing…gelatin.

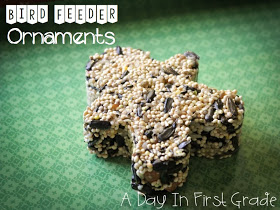
I used the instructions A Day in First Grade for Bird Feeeder Ornaments.

pictures for my blog.116

This calls for:

-a packet of gelatin
-bird seed
-cookie cutters
-boiling water
– waxed paper on a cookie sheet

I ran into trouble right away because I only had lime jello…and no waxed paper.

Since it was freezing and snowing out, I went with it.

DSCF0543

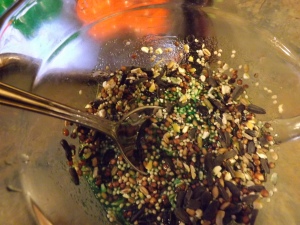
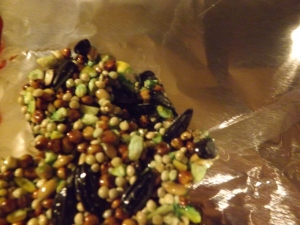
I boiled my water and added 1/4C to the packet of Jello, then poured in the 3/4 C of bird seed. It looked soupy to me so I added 1/4 C more.

DSCF0544
I
t still looked a little soupy but I thought “what the hell” and continued.

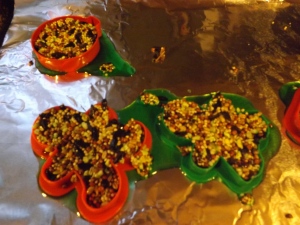
At this point you are supposed to put your cookie cutters on a waxed paper lined cookie sheet and fill them in with the gelatin coated bird seed. When I did this a strange thing happened.

DSCF0545
T
here was a little seepage…

DSCF0546
O
K…a lot of seepage.

At this point I put it in the fridge and hoped for the best.

After about 1/2 an hour I pulled them out and checked to see if they were setting at all.

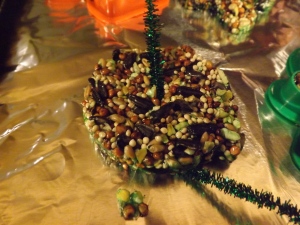
When I picked them them up, this is what I saw.

DSCF0556

And one of the cutters came off, leaving the formed ornament behind.

DSCF0557DSCF0558

Which I was then able to pick up with a spatula…

DSCF0559

and stick a pipe cleaner in it to hang it up.

However, when I tried to do the same with one of the other ornaments we had a little collateral damage…

DSCF0560
We can rebuild him, we have the technology!

In the end I just stuck them as is on a clean piece of tin foil and put them on the porch.

DSCF0562

Since it’s currently -2 F and dropping I’m betting that they were frozen before I finished this post, but I’m too cold to go check.

Wet Felting in Bags

Every year on Christmas Eve we pick a country, cook some food from it (their traditional Christmas food if we can find it) and do a craft from there as we watch a Christmas movie.

This year we chose Latvia. Things got downgraded a bit due to illness and weather but we still had a good time with it! We cooked Bacon Buns, small pies, beans, gingerbread (we did cookies ‘cuz that is what I had) and we were going to have sausage and cabbage but that didn’t work out. The food was good…

DSCF0437


and so was the movie. We watched Arthur Christmas and if you haven’t seen this movie yet, you need to. Seriously.

The craft we chose was felting. Wet felting to be exact.

I read that the tradition started when soldiers packed their shoes with sheep’s wool which then felted from the heat and sweat of their feet.

Ew. But also kind of cool.

We decided to try doing it in a ziplock bag as described in this tutorial by Kleas. The title of the post is actually “Felting with Kids” so I felt we had a good chance of being successful here.

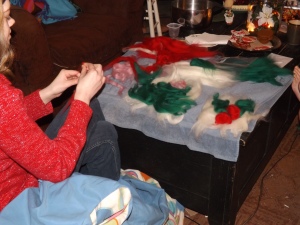
Basically you make your pattern…

DSCF0442DSCF0444


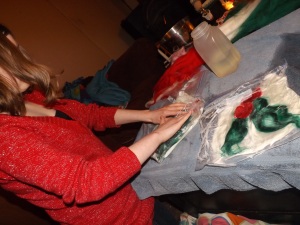
Then you carefully place them in a ziplock with hot, soapy water, make sure all the wool is soaked then squeeze out the extra water..

DSCF0445


then seal up the bag and rub/pound/poke the heck out of it.

We had varying degrees of success. Daughters did not hold together as well as mine did, but even mine lost on of it’s holly berries. The red, in particular, didn’t seem to want to stick.

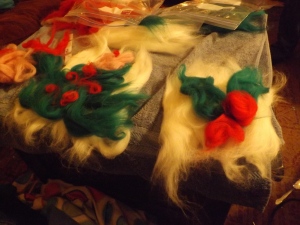
Here’s what they looked like as they were drying.

DSCF0446


Everything looked fluffier after drying but her’s never really held together. I suspect that we were a little to impatient and didn’t pummel it long enough. I actually tried to re-do mine but that second berry still didn’t want to stay attached. We may not have used enough soap as well but neither soap quantity or length of wool abuse was specified so we may never know.

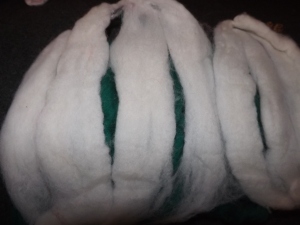
I do have a couple of tips for you if you want to try this. Make sure you use enough wool roving when you make the background. If you don’t it will end up ropey like the back of daughter’s did.

DSCF0488


My back looked better…

DSCF0489


but not perfect and that darn berry never did attach to the front!

DSCF0492
(
sorry about the horrible picture but it was freezing in the room with good lighting).

I’m hoping that with a little hot glue it might look OK in a frame.

DSCF0491DSCF0486


or maybe not.

Shortbread Bites

I have been doing my Christmas baking this week and was looking for another cookie to fill in the spaces in some tins I was putting together.

These little lovelies looked perfect!

11fcb84d4fc4156b055f59801c140cc6
Santa’s Shortbread Bites from Baked Perfection

Aren’t they adorable? I even had all the ingredients!

I think my first mistake was not using a food processor. I wasn’t sure if a “knife blade” was the same as the regular blade so I decided to do it by hand. I measured and mixed flour and sugar. I cubed up the butter and started combining. After a ridiculous amount of time it finally formed a ball. A crumbly ball, but a ball none the less!

My next mistake was not taking the hint when it was nearly impossible to “flatten the dough” at all, never mind into a 8″ x 5″ rectangle. I persevered and managed to cut a sheet full of 1/2″-ish cubes and stuck them in the oven. They were inherently unstable though, and just bumping the cookie sheet on the way into the oven made them crumble a bit.

At this point I was feeling a bit frustrated so I decided to wrap up the rest of the dough and put it in the fridge to see if that helped it hold together better.

20 minutes late I removed the cookies from the oven…

DSCF0390
Um…not quite.

They tasted good though so I thought “maybe the rest of the dough in the fridge set up!” and I went and got it and unwrapped it.

DSCF0392
Nope.

At this point I gave up.

Shortbread Bites?

DSCF0391

Waste of butter 😦

Tree in a Jar

I really wanted to do another Mason jar craft. After looking over Pinterest I decided on this one:

A Blog Entry Portrait-004

from Seeing Ink Spots.

However when I went to assemble my supplies I realized I was out of the big mason jars. I did have little jelly jars though. No problem, I’ll just make a little tree!

Here we go!

DSCF0002

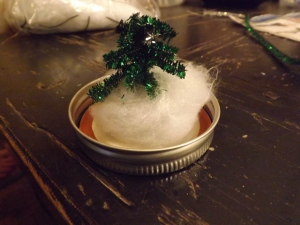
Since everything was going to be in miniature I decided to skip the spool base and attach the tree directly to the cover. I was going to use epsom salt for “snow” but apparently the bag I had of it is gone. Plan B was to make some spider web snow cover. I also dug out the silver glitter hairspray which I planned to spray the “snow” with.

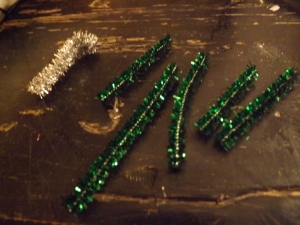
First I cut some trunks from the silver pipe cleaners and branches from the green ones.

DSCF0005

Then I attached the branches to the trunk…

DSCF0006

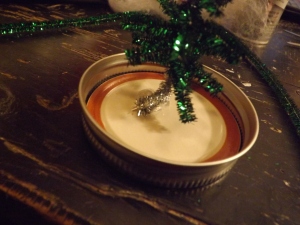
and attached it to the cover.

DSCF0007

Then I covered the inside of the cover with webbing snow…

DSCF0008

and sprayed it all with glitter, including the inside of the jar.

I had to trim the tree. Trim as in cut the branches not decorate them. The snow is all bunched up from the cover being screwed on.

DSCF0015

This is it with the cover on.

DSCF0016DSCF0018

Yah…not so cute.

I like the idea of this, and I’m sure it would have come out better full sized. I may actually try again when I have a bigger jar and more pipe cleaners but for now? Definitely a fail.

Paperbag Gingerbread Man

I am on a mission. A Christmas craft mission.

The first craft I decided to try was the Gingerbread Ornament from Patternpage.com

Sierra Exif JPEG

I assembled all my supplies and got to work!

DSCF9981

We have paper bags, pencils, sharpies, a cookie cutter (more on that in a bit)  and leftover spider’s web for stuffing. Also the glue gun that didn’t make the picture.

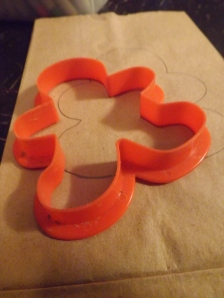
Of course nothing goes smoothly here. The pattern was too big for the little lunch sized bags I have so I had to trace a cookie cutter.

DSCF9982

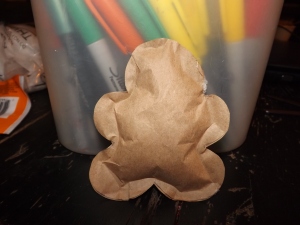
Next I cut out the gingerbread men and put hot glue around the edges of the two pieces of paper and stuck them together. Then I stuffed the gingerbread man with webbing and sealed up the edges. I didn’t get any pictures of that because, quite frankly, I was too busy burning my fingers and getting webbing stuck in the glue but here is a picture of it all done:

DSCF9985

It was not easy stuffing that sucker and I did not get the glue near enough to the edges so his arms and legs don’t have enough stuffing. If you look closely you can see that we had a little stuffing hemorrhage on the left side of his neck. Also he is very plain.

The example gingerbread man is nicely decorated with ribbon and buttons. I did not have any of that.

I did have some fake holly though…

DSCF9987

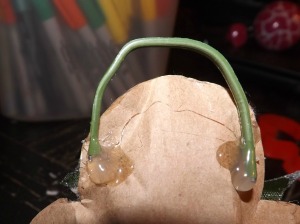
although it ended up looking like a Christmas themed clown bow tie. For some reason we decided he needed eyes but turns out they just make him look afraid. I tried to attach some wire to hang him with but, although it worked it does NOT  look good 😦

DSCF9989

So. I ended up with a frightened Christmas clown with flaccid arms and legs whose insides are leaking out and also burned fingers (mine not Holly boy’s).

Fa la la la fail.

At least I didn’t have to buy anything.

Fall Gourd

When we went apple picking the other day we did not pick pumpkins from the pumpkin patch. Why not? (you ask) Because we are cheap and you can get pumpkins for a lot less at Lowes or Walmart. Plus, most of them were a little soft from sitting in the field too long.

We did get gourds though. Because they were $.99.

But that left me stuck with a gourd to decorate instead of a pumpkin and you can’t carve gourds.

So I looked up no-carve pumpkin decorating on Pinterest and I came up with this…

pumkin decorating header

DIY Pumpkin decorating from The Sweet Escape

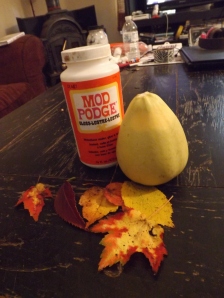
I knew we would need little leaves because gourds are smaller than pumpkins.

The daughter and I hit the front yard and found some, then came inside to get our craft on!

DSCF9830

I skipped the part where she painted the pumpkin because I figured my gourd was pale enough already.

Let me tell you, I’m not sure if it was because my gourd was so small and rounded or because I am uncoordinated, but it is NOT easy to get those suckers to lay anything near flat.

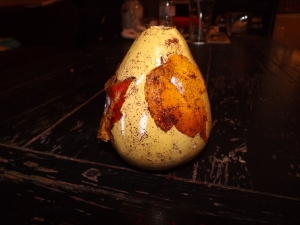
After a crap ton of mod podge and a lot of frustration, this was the result:

DSCF9831DSCF9832

Yeah…not so good.

I basically decided to wait until the mod podge was at least partially dry and then try to stick the edges down. I was only somewhat successful.

DSCF9840DSCF9839

As you can see, although they are definitely better attached, they are still not glued down flat like in the original project.

You can probably also tell that I added something. It didn’t show up well in the pictures but we gave the gourd a bit of fine, red, glitter. It actually makes the gourd catch the light and really improved the project. You can’t tell from the pictures though, because my camera picked now to run low on batteries which meant crappy(er) pictures.

Also, once it was fully dry, the gourd had a nice shine from the mod podge. Would have taken a picture but, you know, dead battery.

It turned out worse than I was hoping and better than I thought it would after first trying to stick those leaves on. Not sure if that makes it a win or a fail? Either way it was not an easy or a fun project, at least not with a gourd.

I would recommend springing for the pumpkin.

Halloween Lantern Jars

Time for another Halloween craft!

This time I picked these Halloween Decoupage jars from Taste of Home.

lantern_300

Cute, no?

I dug out my Mod Podge, found a jar and picked up some Halloween themed tissue paper.

DSCF9730

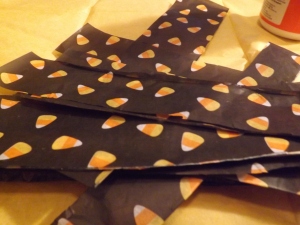
Then I cut the tissue paper of choice into strips…

DSCF9731

slathered that jar up with Mod Podge…

DSCF9733

and stuck the paper on there.

DSCF9734

As you can see, there wasn’t good stickage where the strips of tissue paper overlapped.  I tried to fix that with my top coat of Mod Podge,

DSCF9735

After coating that jar I realized it might be too dark to be an effective lantern. Plus I wanted to try and make one with a face so I went in search of another jar and found this little guy.

DSCF9736

and covered it with the orange-ish tissue.

DSCF9737

Next I printed off some faces from the Taste of Home website, cut them out and Mod Podged them on.

DSCF9738

Isn’t it cute?

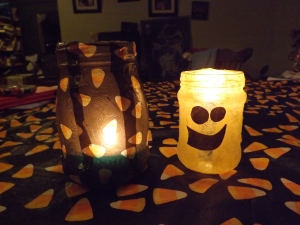
I left them to dry overnight and this was the finished product!

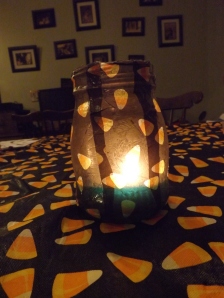
DSCF9744DSCF9745

This was a pretty easy project except for the part where you smooth out the tissue paper. That part didn’t go so well. I also ended up covered in Mod Podge but that could have been me. My fine motor skills are not the best if truth be told. The top edges were difficult for me too. I had to apply more Mod Podge in the morning to neaten them up.

DSCF9741

As you can see the candy corn jar is not too dark for the light to shine through, although the jar got very hot after just a few minutes so I’m not sure that using it for a candle holder is such a great idea. The Jack-o-Lantern was fine, but then I was just burning a birthday candle in it. I think I will try a tea light in that one later and just plan on putting candy in the other one! I also didn’t like how obvious the parts where the tissue paper overlapped were.

Frankly I thought they came out OK…it worked but not something I’d display for company or give as gifts or anything. If I were to try again (and I just might) I would be more careful when overlapping and with the top edge.

Cute?

DSCF9740

Not so much. Also messy and a possible fire hazard.

Summer Sand Globe

My contribution to the Pintester Movement 2.0 This is where I attempt a pin already attempted by the great and powerful Pintester, Sonja Foust.

So I decided to try this pin: Stemware snow globes from Family Chic

1013753_10151805264651622_1905861601_n

If you would like to see the Pintester take on this pin head over there and see it! Just follow this link!
http://pintester.com/2012/12/stemware-snow-globe/

I decided that even though the Pintester says that snow globes are classy any time of year, I wanted to put a summery twist on mine. I decided the way to do that was by making mine a “sand globe”.
941763_10151806897616622_298014824_n
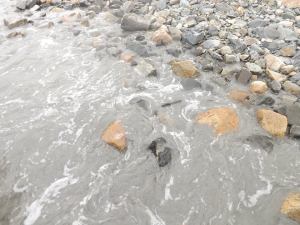
We headed to the beach in search of sand and a few shells and other doo-dads. Problem was, it was high tide. What you see above is pretty much what we saw.
Wet sand. …
No doo dads.
Sadness.
After a walk down the beach (most of it nearly knee deep in water) we did find a small section of dry(ish) sand.

We decided to stop and build some nice sand animals, then we put some of it in a ziplock, looked around the rocks that were still dry and managed to find some other objects appropriate for a sand globe.

1017312_10151807225861622_1059398676_n
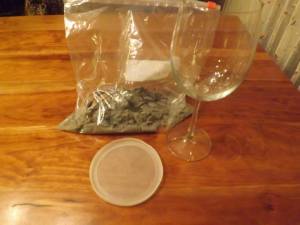
At home I gathered my wine glass, the plastic I used as a bottom (I was afraid that cardboard would get ruined if the sand was still a bit damp) and my bag of beach stuff.

I went through all the stuff in my bag, trying them out to see if they fit inside the glass and if I liked how they looked. In the end I chose a small piece of beach wood, some shells and seaweed.

992784_10151806907346622_1741242335_n
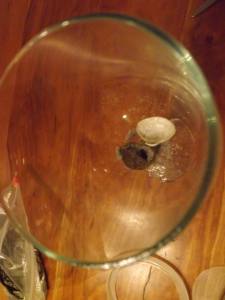
My plan was to glue the wood and seaweed to the plastic then place the small shells and sand in the glass. I put the shells in first and then poured the sand into the glass.
I then traced the wine glass on the plastic (and yes I had to do this upside down because the glass was full of shells and sand) and cut out the circle. I placed the wood piece and seaweed and attached it with epoxy.
(Oh, …did I not mention I was out of glue for the glue gun? Yup. No glue. But I did have left over 5 minute epoxy so I decided to use that)
I didn’t get a picture of the seaweed and wood glued to the plastic top but that’s probably just as well because when I tried to glue it to the top of the glass they fell off and landed in the sand.
Oops.
Apparently I didn’t let it dry long enough or something.
1016288_10151806914261622_1747886515_n
It didn’t turn out so badly though….right? It would have been better with some color, like some sea glass but it was high tide and the only colorful thing I found was a yellow coffee stirrer. It’s not boring, it’s natural…yeah, that’s it. Rustic.

It also would have been better if things would have stayed where I put them but…yeah.

And please ignore the plastic overhang (underhang?) on the bottom.

I also miscalculated, apparently. It may or may not have had something to do with tracing it upside down.

1044892_10151806921631622_1204699303_n
I added a bit of ribbon and a beachy blue candle and I think it turned out pretty cute! Plus, since nothing is actually glued on you can shake it up and change it around.

Just remember to take the candle off first because if it falls on the floor it can roll really quickly away from you and also get a big ugly dent. Not that I have any first hand experience with that or anything…

1011828_10151806949996622_1699894136_n
(Just please ignore the glob of sand covered glue along the back there. Cuz apparently epoxy runs.).

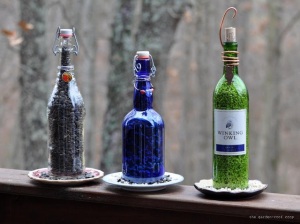
Wine Bottle to Bird Feeder Upcycle

I found this project at The Garden Roof Coop.

wine1 (2)

I don’t even drink wine, but I do feed birds and have relatives that drink plenty of wine so I figured this was a good one to try. Plus I love colored glass. A trip to me mom’s to acquire a wine bottle (green one woot!) and off I go!

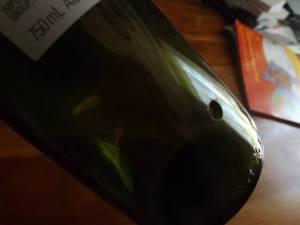
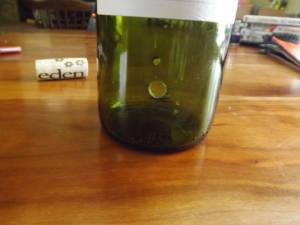
First I drilled hole in wine bottle with diamond bit (we used 1/2″). It takes a little bit of time and you have to keep it cool by misting with water. You are also not supposed to push it through the glass but we found you kind of have to. Just wear your safety glasses, OK?

943349_10151739423041622_1017188347_n

Drill one hole on each side, or more I suppose but this was enough for me. Frankly this process scared the #$@% out of me and I expected the bottle to shatter at any minute but it was fine (probably because my husband actually did it while I misted the bottle with the hose).

946843_10151739425506622_1784369431_n

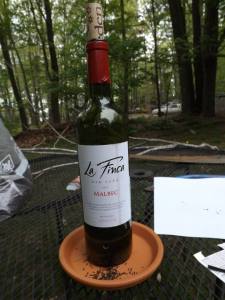
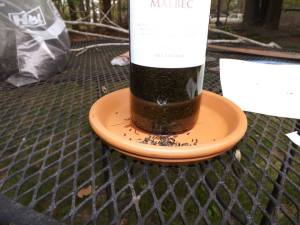
Next we stuck the  bottle to a clay saucer (you could use a pretty china or ceramic saucer but we couldn’t find one) with epoxy. We had this left over from another project. Those aren’t cracks on the saucer, they are dribbles of epoxy (oops!)

969140_10151739428961622_234927083_n

close up-filled the bottle with thistle seed and replaced cork….you could use bigger seed if you made a bigger hole.

579421_10151739432641622_2029349925_n

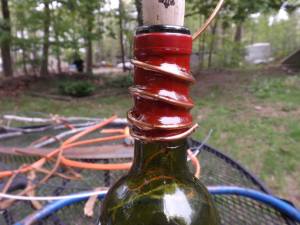
Wrapped copper wire recycled from old, unusable home wiring and coated it with more epoxy. Make sure you do not epoxy the cork on!

428049_10151739433566622_977480703_n

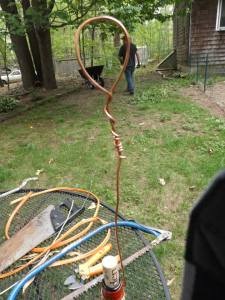
Twisted the top of the wire around to make a hanging loop.

971345_10151739458261622_746760104_n

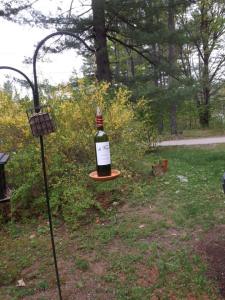
Finished product waiting for the birds to come find it!

946507_10151739458921622_1114114050_n

Update: It has held up great so far and nothing has fallen off BUT the saucer tends to fill up with water when it rains and two weeks later and no birds have used this feeder Not sure if it’s a win or a fail?

Further update: the birds never did use it, water got in and ruined the seed and eventually the saucer fell off. Definitely a fail!