Pin Cushion and pin holder

I have been obsessed with…enjoying making hoop art so I haven’t really had anything new to post.

After making a bunch I had to organize my supplies and figure out better ways to store things. I had been keeping my felt in a small storage box and my needles in a 1/2 cup gladware container. Neither one was working.

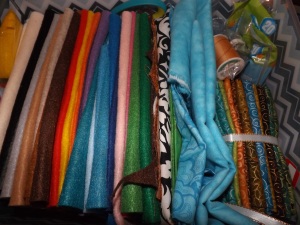
The fabric storage issue was easily fixed by spending $6 on this beauty!

DSCF1794

Just look at all that fabric and felt goodness!

DSCF1792

Well, I said I was a bit obsessed.

The other problem I had was keeping track of my pins and needles. My method of storage left much to be desired. The cover on the gladware was hard enough to get on and off  that I was either not getting it on there all the way or making a sharp thing explosion when I pulled it off. Since this made putting away pins mid project fairly difficult I had gotten in the habit of sticking then into the arm of the chair I was sitting in or on the back of the couch or into the excess fabric of the project.  This would tend to result in scratches and/or lost needles.

I needed a pincushion.

I looked at the craft store, but the only pincushion they had was one you could wear on your wrist. Handy, but I wasn’t going to pay $10 for it. Then I remembered seeing something like this from Megan Neilson.

pincushion8


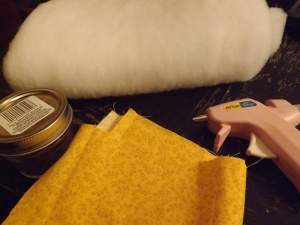
Of course I didn’t bother to look up the instructions. I did remember to but a small mason jar though and since I already had fabric and some batting I figured I was all set.

DSCF1757

The first thing I did was cut some batting to fit on top of the cover. I cut two layers.

DSCF1758


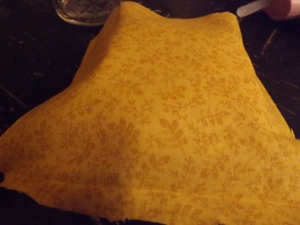
Then I laid the fabric over the top…

DSCF1759

pulled it around and attempted to glue it.

DSCF1760

I have a few tips for you. First trim your fabric but make sure you leave enough so you can glue it beyond where the lid seal (the orange bit) is. If you get glue on the seal part the lid will not screw on correctly. Screwing (ha!) will also be a problem if there is too much batting in that area. I ended up having to trim about 1/2″ of batting off so the cover would fit. Of course I didn’t find out my cover didn’t fit until after I’d glued it. This necessitated ripping the thing apart, trimming, re-gluing and questioning my own sanity.

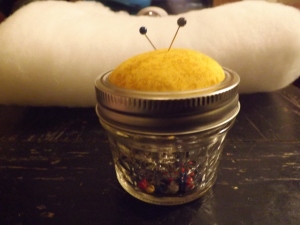
In the end it did come out though.

DSCF1762DSCF1765


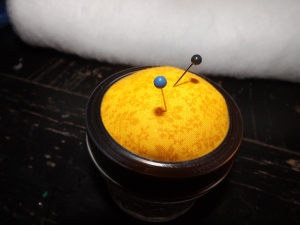
All the sharp things fit neatly inside and there is even room in there for a spool of thread if I’m on the road. Also, since the cover screws on instead of snapping on there are no more pin explosions!

DSCF1766

I’m pretty happy with it!

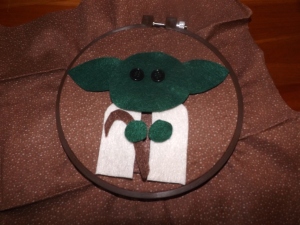
Fandon Felt Hoops

I’m so excited that I can finally share these!! I had been holding off since I made the first couple for a craft swap and I didn’t want to reveal anything before my giftee received hers.

Well, she got ’em so now you get to see ’em too!

These are your basic hoop felt art (google it) with a geeky twist. You need embroidery hoops, fabric to fit inside them (I bought some fat quarters-got two 6″ hoops out of each one), sheets of craft felt in various colors, thread (you can use embroidery floss or regular thread), embroidery needle, scissors, buttons and some stuffing.

DSCF1627

So, you stretch the fabric onto the hoop, cut the pieces of felt out to make your picture and lay them out.

DSCF1628DSCF1629

then you pin the felt pieces in place (trust me don’t skip this)…

DSCF1630

and then stitch everything together!

DSCF1638

As you can see I’ve stuffed Pikachu’s body to make it a little 3-D.  I just stitched most of the way around then stuck some wool in there and finished sewing him up.

Here’s a close up.

DSCF1634

To finish these off you just trim the fabric to about an inch around the hoop, hot glue it to the inside of the hoop nice and tight. I’m just starting here, continue all the way around.

DSCF1704

Then cut another piece of felt to fit over the back and hot glue it on.

DSCF1640

I had a lot of fun making those first two and quickly made more.

fh2 DSCF1713

DSCF1695 DSCF1696

Frankly I’m rather obsessed with these! They are so easy and cute!

Felt Kittens

I am working on a project that I can’t share yet.

It’s driving me CRAZY!!

In the meantime I have been playing with some felt. There are so many little felt doo-dads you can make; flowers, Christmas ornaments, hoop pictures…some are simple while some are covered in embroidery.

I opted for cats. I went for simple.

Basically I cut out two vaguely cat shaped pieces of felt, stitched on some bead eyes and embroidery nose, mouth and whiskers and Viola! A kitten!

DSCF1659

I gave it paws too but I really like them.Plus my blanket stitching sucks.

I tried again and came up with this little guy…

DSCF1655

My stitching is either much better or more disguised by using matching thread. Either way I like him a lot better.

Flush with success I decided to make another.

DSCF1665


Should have quit while I was ahead.

Let me explain the wonky eye. I chose the dark blue beads and then after I sewed the first one on I discovered I lost the second one. I couldn’t find another one like it, and I was too lazy to find a new pair so I just used the closest bead to it I could find.  So sue me.

Also turns out my stitching is maybe not improving so much.

Oh yeah…they have tails too!

DSCF1668

Peep Jousting for fun and education

The boy and I have been studying heat energy and transfer in our homeschool. One way to demonstrate the concept of how gasses expand when heated is to heat a marshmallow in the microwave. The air in the marshmallow (of which there is a lot!) gets hot and expands and this, along with the softened sugar walls of the marshmallow, allow the marshmallow to grow.

A bunch.

What’s even better than a plain marshmallow that gets huge and puffy? A chick shaped marshmallow that gets huge and puffy!

And what’s even better than that? Two such marshmallows locked in mortal combat.

Observe.

DSCF1613

Sir Peepigan and Sir Chick of Marshmallow prepare for battle!

DSCF1614

Their swords are at the ready. Er…their floss pics that is. Traditionally peep jousting is done with toothpicks but I didn’t have any.

The premise of peep jousting is simple. Put two peeps on plate and arm them, then put them in the microwave and turn it on. The peeps will swell and eventually one of the peeps will pierce the other and cause it to deflate. The piercer is the winner.

Our knights fought valiantly indeed, but alas, in the end there were no survivors!

DSCF1617

When we fought two of their fellow knights the results were more conclusive.

DSCF1623

Although it appears that Sir Smoosh may have perished from heat exhaustion because Sir Surcre’s sword is suspiciously clean.