Foodie Pen Pal Reveal-January

I participated in the Foodie Pen Pal program at The Lean Green Bean this month. This is the second time I have taken part in the program.

This month I was paired up with Jen in Georgia and she did a great job!

This is what I found when I opened the box…


DSCF0648


The goodies just kept coming! She really sent me a haul!

DSCF0650


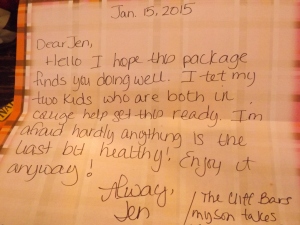
Along with this lovely note 🙂

DSCF0651


Right away I snitched those cookies and had some with a cup of tea….lovely! My son took off with the licorice and my daughter the rest of the tea. I knew it was a good idea to act fast 😉

In all we got:

Shortbread cookies
Nature Valley Bars (sweet and salty/yogurt granola)
Cliff Bars (chocolate brownie and white chocolate macadamia)
Sugar Free Hard Candy in Coffee and Fruit flavor
Pasta Roni in garlic olive oil
Watermelon licorice
A box of green tea
Goldfish Grahams in vanilla cupcake
Locally grown peanuts from a general store near her home

The bars went into our bag for our cheer competition for tomorrow. They look delicious and they will come in handy….we never get time to eat at those things! I am looking forward to the noodles too, they sound like they will go well with a balsamic chicken recipe I’m planning!

Thanks Jen!!

Graphic Fandom Art-The X-Files

X-Files was my first fandom. Well, after Scooby Doo 😉

I loved Doctor Who, I was immersed in X-Files.

I was in love with Mulder, I wanted to be Scully. I bought companion books (this was before I was on-line). I watched with baited breath every week. I knew the characters, in and out, backwards and forwards. I developed a bit of an obsession with cryptozoology.

I KNEW the truth was out there!

My fanaticism has faded a bit over the years, but Mulder and Scully will always hold a special place in my heart.

X-files had to be part of this project, but I wasn’t sure how. Thing is, I had kind of made a deal with myself when I began this to not use any text on the canvases. I wanted to not make it obvious what they were. I wanted people to have to think about it.

This text ban left out the obvious things like Mulder’s posters or the logo. I tried to copy the X part of the logo without the text but I just made a mess of it.

In the end I decided to replicate, in some way, the masking tape X in the window.

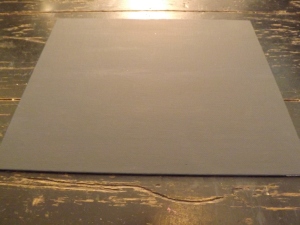
First I painted the canvas, grey again because it’s night…duh!

DSCF0652

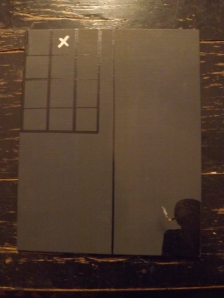
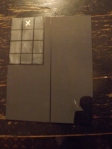
Decided to turn it portrait and then added a window to the upper left corner and added my X.

DSCF0653

I kind of wonked up the upper corner there.

Then I drew a line down next to it to signify the corner of the building. Well, at least to me.

DSCF0654

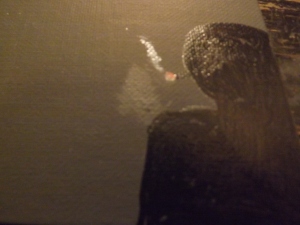
Then I drew my version of the Cigarette Smoking Man in the lower right corner. At first I tried to make it so he was holding his cigarette, but that looked like he had a glowing tumor on his shoulder so I painted it over and put the cigarette in his mouth.

DSCF0655

The paint is still a little wet here, thus the smudgyness.

Here is a view of the whole thing…

DSCF0656

I liked it…but you really couldn’t see the window from far away. Plus I felt like there should be light inside the window.

My solution was to color wash the inside of the window with the lighter grey. Then I had to re-draw the window lines and the X.

Here is the finished project!

DSCF0657

I really like how it turned out! Especially considering the mess I made of the logo, which may or not have looked like white lady bits someone had infected with black amoeba. Yah, this is much better 🙂

This marks the last of my Fandom art projects. I’m getting kind of tired of them truth be told. Plus I’m out of canvases.

Here they all are!

DSCF0657  DSCF0642  DSCF0629  DSCF0605  DSCF0607

And here they all are on the wall!

DSCF0661

Graphic Fandom Art-Doctor Who

Those of you who are hoping for bow tie themed or something featuring fish fingers and custard are about to be disappointed. I love Ten and Eleven as much as the next gal but when I think of The Doctor, I think of jelly babies, K9 and very long, multicolored scarves.

Number Four is my Doctor.


Tom-Baker-source_nerdist
Ah…Tom Baker! (that’s his face when he saw my finished project-sorry Tom.)

Brings back memories of sitting on the living room floor with my brothers waiting for the weekly episode to start…”woo-eee-ooo”

Yah, I’m old.

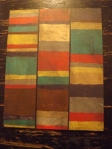
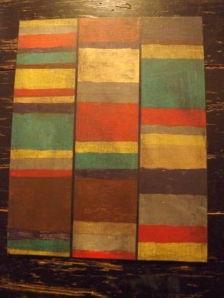
I knew that I wanted to recreate the scarf in some form.  Since these projects are supposed to be very simple, almost to the point of only being understood by someone “in the know”, I knew the color sequence would be the key. Of course while I was at the store I forgot my color list. The one I looked at on my phone called for mustard, bronze, camel, grey, rust, purple and green.  I got all those colors only to realize when I compared them to the real scarf that they were too bright by a mile.

Since when has inaccuracy stopped me?

Onward!

The pattern I used was the Official BBC pattern on androgums.org. I used the first one.

The method to my madness was this:

First I divided my canvas into three columns. Then I took the length of the canvas, multiplied it my 3. Then I added up the total of rows in the pattern, divided the number of inches by the number of rows and got a measurement for each row. While laying out the rows I multiplied the row measurement by the number of rows for that color and marked it off. I then labeled each section with a dot of color.

DSCF0639

Sound like a good plan doesn’t it? Well, my math must have been off because when I got to the end of my third row I still had several rows left to do. At that point I improvised, by which I mean I went rogue and made the last few rows the way I wanted them to look.

I figured that if I had the colors wrong I didn’t need the pattern to be exact, right?

OK. time to fill those suckers in!

DSCF0639

This process was not with issues (you are shocked I know). Even though I had paint pens, it was very hard to stay in the lines. Plus I had to use regular paint for the purple and I couldn’t get good coverage. Then I smudged the not yet dry paint in a couple of spots.

DSCF0641

I covered a lot of the rough edges by drawing black lines between the columns, and that neatened it up a bit, but I was decidedly “meh” about the project at this point.

I decided to clean up the outer edges by painting them charcoal. Then I got the idea to tone down the bright colors by color washing the whole canvas with the same charcoal color. I also turned it so it’s portrait rather than landscape.

DSCF0642

I like it sooo much better now 🙂  The colors are much closer and the color wash hides my smudges and any pencil line that were showing through the lighter colors.

Tom Baker might not approve, but I do 🙂

Graphic Fandom Art-Miyazaki

Another thing I am a big fan of is Miyazaki. I absolutely LOVE his films!

I could wax philosophical for hours about Nausicaa, Totoro, Kiki and even Porco Roso! My favorite though has got to be Spirited Away. It’s just so beautiful, and amazing! That’s probably why I decided to make a No Face picture.

We can skip the painted canvas picture this time…same deal, different color. I chose a charcoal grey this time.

DSCF0620

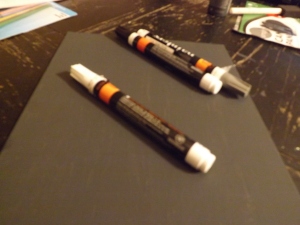
As you can see, I now have paint pens!!
I first sketched an outline of No Face onto the painted canvas with a pencil. I used a serving spoon to get the oval shape of No Face’s, well, face, then I colored it in with the white paint pen.

DSCF0622

The white pen didn’t give good coverage over the charcoal paint, but after painting over some spots it came out pretty well. The pen was great for the edges though.

Next I used the black pen to color his robe in.  This worked better but would have taken a really long time to try and over every inch with the pen. I ended up scribbling heavily in small areas and while it was wet, spreading it out with a sponge brush.

DSCF0624

It worked really well and still let me have control around the edges.

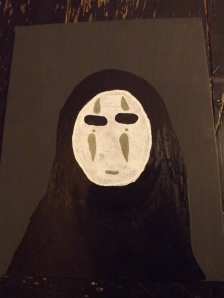
For his face a drew first with a pencil, then colored in with a paint pen. I used black and a lighter grey.

DSCF0625

He isn’t perfect; his eyes are a little off, his face needs more coverage and his robe is a bit wonky, but I like my No Face 🙂

DSCF0629

Graphic Fandon Art-Harry Potter

This was so simple and I think it came out really cool looking!
As you have probably gathered by the many Harry Potter crafts on this blog, we are big fans! We are, in fact, huge, dressing up for premieres, knowing our house, arguing about cannon fans. I could not leave HP out of my fandom project!

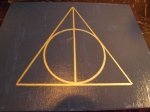
Trouble was, there are a lot of icons associated with Harry Potter. Of course, some are simpler to draw then others and judging by my last attempt I needed something really simple. In the end I went about as simple as you can get and chose the Deathly Hallows symbol.

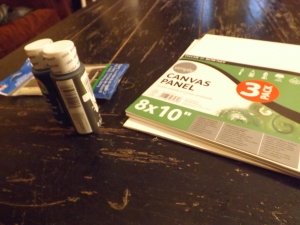
I gathered my supplies once again!

DSCF0593

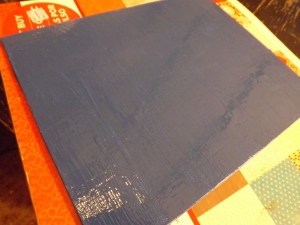
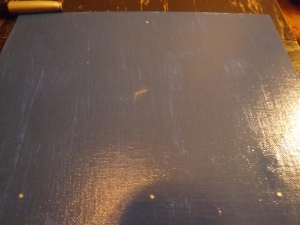
Then I painted the canvas. I chose a background of Ravenclaw blue.

DSCF0594

Once that was dry, I needed to get the symbol on there.  I considered painting it but I didn’t want to try and use the paintbrush again. I still didn’t have a paintpen, but I did have something almost as good…a whole mess of sharpies! I dug through that sucker and decided on a silver metallic sharpie. I would have used bronze but it was dried up.

First I measured and marked out the triangle points and marked them as well as the midpoint of the bottom for the elder wand line.

DSCF0604

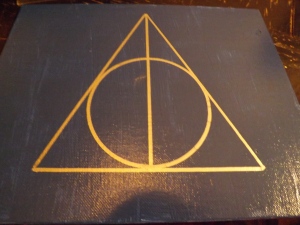
Then I connected the lines. Now I had to make the circle. No way was I going to attempt that freehand so I traced a drinking glass.

DSCF0605

Pretty good, huh? I really like how this came out. Simple, easily recognized, neat looking. I’m pleased 🙂

There’s a little sharpie smudge in the middle there which I will probably paint over at some point but not now because I already cleaned up the paint and junk.

Graphic Fandom Art-Sherlock

Over the next few days I am going to be posting a series of art projects I am putting together. I plan on them being very simple, graphic representations of the various fandoms that I am, or have been, part of throughout my life.

Or that’s the idea anyway.

Today I am making a canvas based on Sherlock because the daughter and I have been re-watching season 2 on PBS and are eagerly, and impatiently, awaiting season 3. It doesn’t come anyplace we can get it until 1/19 so no spoilers please!

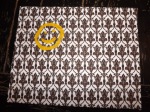
I wanted to make something based on Sherlock’s bored smiley face.

First thing I did was print off an example of the wallpaper and then set all my supplies…

DSCF0595

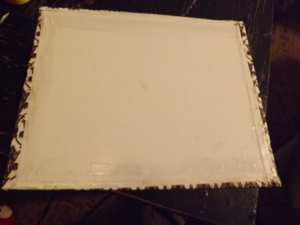
I covered the canvas with Mod Podge and laid on the printed page. I smoothed out the bubbles and wrinkles and then flipped it over so I could fold the excess over and attach them too the back. This is when I realized I’d made a mistake…

DSCF0597

Oops!

The paper was too stuck to adjust now and I was really worried that with that pattern it would be really obvious. Kept going anyway though.

After I folded over the edges of the paper and attached them with more mod Podge it looked thus…

DSCF0598

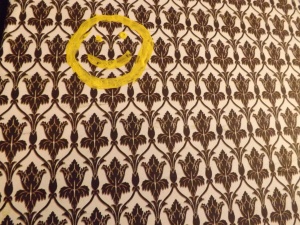
I let it dry a bit, then flipped in back over and attempted to paint the smilely.

DSCF0603

I was not happy with how it turned out. When I was buying the stuff for this project I almost bought a paint pen for this and I really wish I had.

It did look a little better after a second coat…and from further away.

DSCF0607

If you want to try this be careful when you attach the paper.  And spring for the paint pen.

Orange Bird Feeders

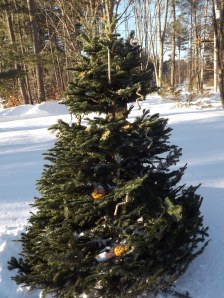
Today I am finishing up the bird feeders/decorations for our Christmas tree, which is now sitting outside in the snow.

I decided to try and make the Natural Bird Feeders from Lady of the Arts.

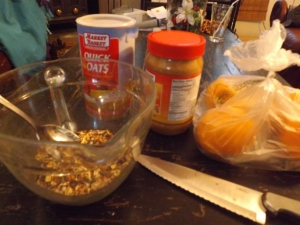
For this you need:

Peanut butter
oranges
bird food
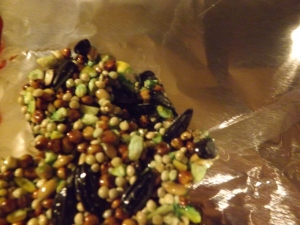
we also used some oatmeal

Here’s my prep.

DSCF0566

It’s pretty simple.

First slice the oranges in half…

DSCF0567

then you gut them. We found the easiest way to do that was to segment it like a grapefruit and then scoop out the segments.

You end up with orange shells like these.

DSCF0571

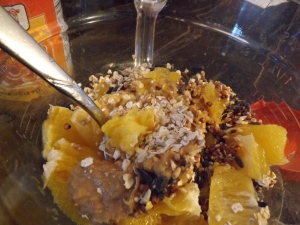
Throw the orange guts into a bowl with the peanut butter, oatmeal and bird seed…

DSCF0570

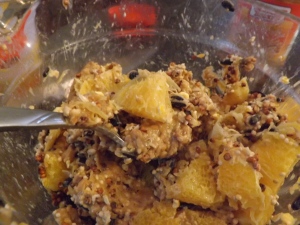
stir that stuff up…

DSCF0573

and stuff the orange bowls!

DSCF0574

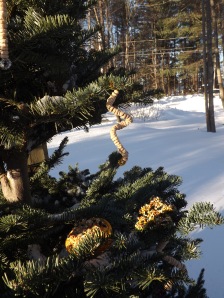
I didn’t bother to string these so I could hang them because we planned on just setting them right on the branches of the tree.

DSCF0577

We ended up doing the same thing with most of the cookies since they never did solidify enough to support their own weight while hanging.

DSCF0565

At least the cheerio ornaments hung properly!

DSCF0578

You ended up not being able to see most of the “decorations due to us having to lay them in there rather than hang them but here is the finished tree..

DSCF0576

Ta Da?

Hopefully the birds enjoy it.

Cheerio Bird Ornaments

I have my bird cookies stashed in the freezer and we decided to go with something easier this time around.

I chose Cheerio bird feeders from Happy Hooligans (and yes, everyone in this house is old enough to drive, your point?)

I told we opted for easy.

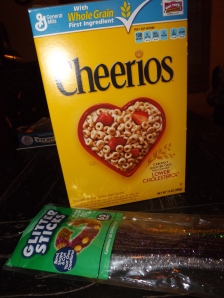
Basically you need pipe cleaners and cheerios.

DSCF0547


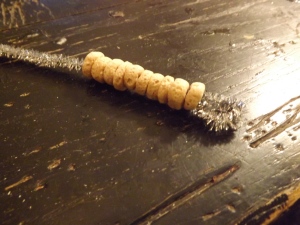
You just make a loop on one end so the cereal doesn’t slide off…

DSCF0550
a
nd start threading those little buggers on there!

Make sure to leave enough pipe cleaner un-threaded so that you can make a hook or loop to hang the ornament!

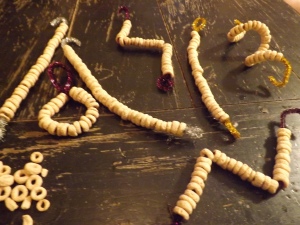
We had a great deal of fun making these.

DSCF0555


This was one of my favorites…

DSCF0554


So that’s it. Told you it was easy.

Tomorrow I am going to make another type of bird feeder and then we decorate the tree. Honestly I am hoping it will be warmer then, we had a high of 12F today (and don’t worry the birds already have food).

Bird Food Cookies

One of our family traditions is that when we take our tree down we put it in the yad and decorated it for the birds. In the past that has consisted mostly of suet and those peanut butter and bird seed covered pine cones with a few hanging fruit slices and maybe a popcorn and dried fruit garland.

This year we decided to branch out a little.

I have tried in the past to make bird food ornaments for the tree but they always fell apart. I hit Pinterest and found out what I was missing…gelatin.

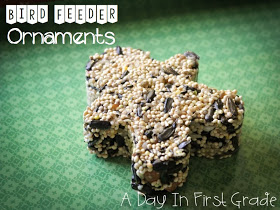
I used the instructions A Day in First Grade for Bird Feeeder Ornaments.

pictures for my blog.116

This calls for:

-a packet of gelatin
-bird seed
-cookie cutters
-boiling water
– waxed paper on a cookie sheet

I ran into trouble right away because I only had lime jello…and no waxed paper.

Since it was freezing and snowing out, I went with it.

DSCF0543

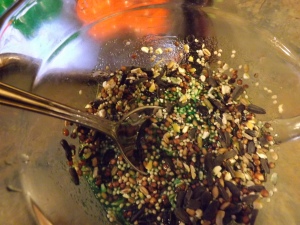
I boiled my water and added 1/4C to the packet of Jello, then poured in the 3/4 C of bird seed. It looked soupy to me so I added 1/4 C more.

DSCF0544
I
t still looked a little soupy but I thought “what the hell” and continued.

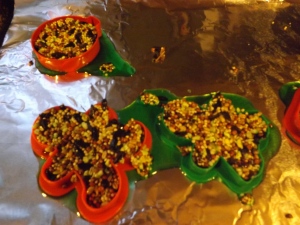
At this point you are supposed to put your cookie cutters on a waxed paper lined cookie sheet and fill them in with the gelatin coated bird seed. When I did this a strange thing happened.

DSCF0545
T
here was a little seepage…

DSCF0546
O
K…a lot of seepage.

At this point I put it in the fridge and hoped for the best.

After about 1/2 an hour I pulled them out and checked to see if they were setting at all.

When I picked them them up, this is what I saw.

DSCF0556

And one of the cutters came off, leaving the formed ornament behind.

DSCF0557DSCF0558

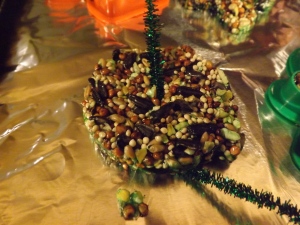
Which I was then able to pick up with a spatula…

DSCF0559

and stick a pipe cleaner in it to hang it up.

However, when I tried to do the same with one of the other ornaments we had a little collateral damage…

DSCF0560
We can rebuild him, we have the technology!

In the end I just stuck them as is on a clean piece of tin foil and put them on the porch.

DSCF0562

Since it’s currently -2 F and dropping I’m betting that they were frozen before I finished this post, but I’m too cold to go check.