So, there are big changes coming to our house this year. My son will be attending an online virtual public school after being homeschooled since preschool.
Yikes doesn’t even begin to cover it.
Anyway, we needed a planner so I hit up Pinterest!
There were quite a few versions of the composition notebook transformed into a school planner. I mainly used the directions from Large Family Mothering for a Homeschool Planner for Under a Dollar (even though mine costs more than a dollar and we will no longer be homeschooling *sob*).
The first thing I changed was to use Duck tape in place of fabric.
Two reasons for this:
1. it sounded easier to me
2. I found this stuff
Oh yes, that is gummy bear Duck tape.
For those of you not in the know, my son happens to be obsessed with gummy bears so this is perfect!
Onward! My supplies:
First I put a strip of tape along the back edge.
I did the same on the other side and then along the spine. Hindsight being 20/20, I would put the spine piece on first but this works.
Next I decided to add a pen holder. For that I stuck a strip of tape back onto itself so that it was no longer sticky. I left a bit of uncovered tape so I could then make a loop.
OK that’s a terrible picture, and I ended up making another one because that one wasn’t neat enough, but I think it shows what I mean.
Then make the loop and stick it to the inside of the front (or back, your call) cover.
Here is the finished outside.
and a close up of the pen holder.
Now onto the inside! The instructions said to allow 5 line for each block inside the calendar but I found that on my notebook that came out wonky, possibly because it was college ruled. At any rate, I used 6 spaces per square and made each 2″ across, starting after the left margin and going straight across. This made the “Sunday” slot 1.5″ and left a margin line through Thursday. I can live with that, your mileage may vary. Then I labeled the day of the week (I started with Monday because it’s a school planner but it’s up to you) and put the Month in the left margin.
Here’s a picture of September:
As you can see, I brought the lines a little two far in spots. Be careful not to do that 😉 I got better as I did more blocking.
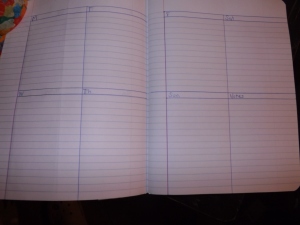
After blocking out the month, I made a weekly page for each week in the month. This was easier by far. Simply work inside the margins and block each page into four sections. I labled them Monday-Friday and then the last one “notes”.
The inside took way longer than the outside! Like waaaayyyy longer. All said this took me almost 4 hours to make, Honestly, except for the customization factor I wouldn’t bother. You can get a decent planner at Dollar Tree ($1) or even a pretty one Walmart and Target for about $10. I spent $3 for tape and $3 for a composition book (although you can get them way cheaper) so I have $6 into this plus a lot of time. Of course, I have lots of adorable gummy bear Duck tape left over so there is that. It wasn’t a difficult project though, and it turned out pretty cute!


