Orange Bird Feeders

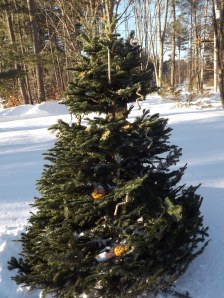
Today I am finishing up the bird feeders/decorations for our Christmas tree, which is now sitting outside in the snow.

I decided to try and make the Natural Bird Feeders from Lady of the Arts.

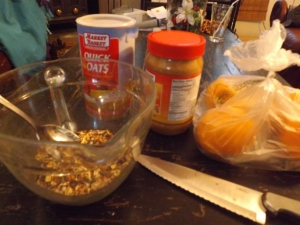
For this you need:

Peanut butter
oranges
bird food
we also used some oatmeal

Here’s my prep.

DSCF0566

It’s pretty simple.

First slice the oranges in half…

DSCF0567

then you gut them. We found the easiest way to do that was to segment it like a grapefruit and then scoop out the segments.

You end up with orange shells like these.

DSCF0571

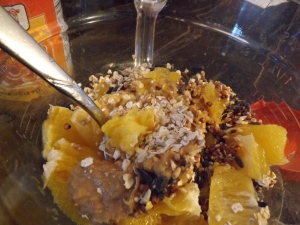
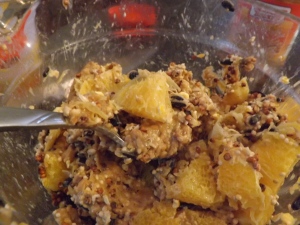
Throw the orange guts into a bowl with the peanut butter, oatmeal and bird seed…

DSCF0570

stir that stuff up…

DSCF0573

and stuff the orange bowls!

DSCF0574

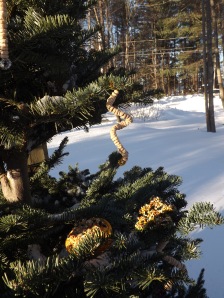
I didn’t bother to string these so I could hang them because we planned on just setting them right on the branches of the tree.

DSCF0577

We ended up doing the same thing with most of the cookies since they never did solidify enough to support their own weight while hanging.

DSCF0565

At least the cheerio ornaments hung properly!

DSCF0578

You ended up not being able to see most of the “decorations due to us having to lay them in there rather than hang them but here is the finished tree..

DSCF0576

Ta Da?

Hopefully the birds enjoy it.

Nancy Drew Themed Cookies

The oldest and I are big fans of the Nancy Drew PC games.  We just love them! Every now and again Her Interactive has a contest and we love to enter them. This time it was to make Nancy Drew theme cookies. After much debate we decided to make Sinclair’s Oaxacan cookies from Secret of the Scarlet Hand and a cookie that looked like the necklace from The Captive Curse.

Here is what they should look like:

SSH_Cookie

Nancy_Drew_-_The_Captive_Curse_Cover_Art

We decided to make the first using a cake mix cookies recipe I have adapted and the second by making a bagged sugar cookie mix. After submitting I think we may be disqualified for this but oh well. We will see what happens.

Anyway…

I knew we would want to do a stained glass cookie sort of thing to make the “jewel” in the necklace. We crushed up some life savers for that purpose. Then we made the dough, chilled it, and started cutting out the shapes…

DSCF0404DSCF0405

The trial cookie we made was left a little too long in the oven (7min) which caused the life saver bits to bubble and turn black.  Also stick to the pan.

We only put the second batch in for 5min and they came out looking much better but they still stuck a bit. We were able to get most of them loose but not without trauma.

DSCF0407

And that’s not the worst of it. One of them was sticking until suddenly it wasn’t and it went flying  into air and landed behind the microwave.

But at least three survived and we decorated them. The green one was our decoration test cookies and it got eaten before we could really get a picture of it but here are the other two, modeled by the oldest!

DSCF0409DSCF0410

Next up were the Oaxaca cookies. It’s hard to see, but the cookies had a sort of face on them and were filled sandwich cookies.

We mixed up the cake mix cookies..

DSCF0406

and formed them into balls, onto which daughter tried to carve features. Once we baked them you couldn’t really see them so we pressed them in while the cookies were still hot. That worked pretty well.

I didn’t get very many (well any really) pictures of the process because by then everyone was pretty silly. And sticky. And I was a little afraid to ruin my camera.

I did get a picture of the finished product though!

DSCF0412

They are looking a little too happy if you ask me but nobody did 😉 In the game they are poisonous so…

Not sure how authentic these are but we had a blast making them (and are still giggling about the flying cookies) so I consider the experience a success!

Edible DNA

This week in school we are learning about DNA. My son is very visual and hands on so I knew that we would have to throw a project that involved 3-D representation in there somewhere. I found a bunch of ideas at Science Matters and considered some of them but in the end decided to go with the classic Marshmallow DNA model

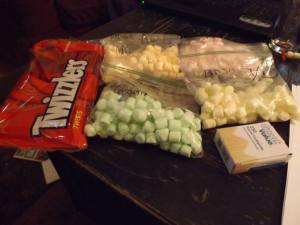
Here are our supplies:

1376465_10152020960471622_1440951327_n


Twizzlers
mini fruit flavor marshmallows
toothpicks

I separated the marshmallows into the four colors, put each in it’s bag and labeled each color as a base; yellow=T, green=G, orange=A and pink=C.

Since I wasn’t the one doing this project I didn’t get to take many pictures but the basic idea is that since base A always pairs with base T and base C always pairs with base G, you make pairs using those bases on toothpicks and then attach the pairs to the Twizzlers like rungs on a ladder and twist.

1382391_10152020961846622_844764524_n

Voila! DNA!

Then we went a step further and decided to build a protein using our base marshmallows and a amino acid codex. Since real proteins have a LOT of amino acids we made one up. We named it Oswaldin and decided it was in octopus ink. (who get’s the reference?)

I gave the boy a sequence of amino acids and he figured out the bases needed to make them (we changed T to U) and attached them three to a toothpick. Than we attached the amino acids in the correct order to make our protien.

Here’s what it looked like:

1385801_10152020962691622_212580897_n


It was a fun activity and it brought the point across to the boy better than a worksheet or any amount of reading could.

Plus it was delicious 😉


Flashback Frid….er Sunday? Chicken Mummies!

This is more of an activity then a craft, but since there is crafty involved I think it totally counts. This project is from awhile back when we studied ancient Egypt.

I have never mentioned it here but we are a homeschooling family. One of the great things about homeschooling is that we can do awesome, fun projects.

One of those projects is making these chicken mummies!

First you need some supplies:

27097_382976991621_4002269_n

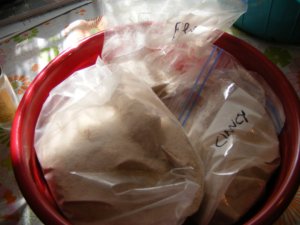
salt
cinnamon
baking soda
baking powder
alcohol
oil (any type-not pictured)
large ziplock bags
small frying chickens or Cornish hens

If your poultry of choice is frozen, thaw it out.

27097_382977016621_7081793_n

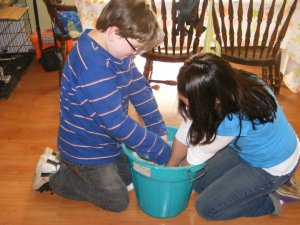
Mix up the ingredients for the natron salt…
27097_382978991621_2267351_n

this was the kids favorite part!

The natron is where you use all that salt, baking soda, baking powder and some of the cinnamon. I looked all over for the directions we originally used and couldn’t find them but I seem to remember a ratio of 1/2 salt, 1/4 BS and 1/4 BP and then add a bunch of spices. I have seen directions using all salt so I think as long you have plenty of that you will be all set. You will need to make a LOT of natron so if you can get the ingredients in bulk, do so. Otherwise you will have to go to Walmart and buy all that stuff you see in my picture…more than once…and the cashiers will begin to wonder about you.

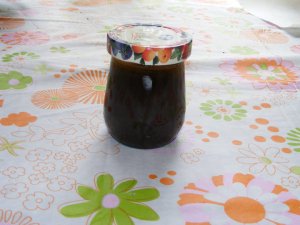
You will also need some spiced oil. This is basically oil and spices (shocking!) that you need to mix up early on as the spices need to steep in a jar. Neither the natron nor the oil recipes specify cinnamon, you can use any aromatic spice (cinnamon. cloves, nutmeg, allspice), but since I had to use a butt-ton I went with the 2/$1 cinnamon.

Here is our spiced oil percolating in an old jam jar.
27097_382977026621_3001571_n

Now you need to get the chickens ready. We used Cornish hens. You need to wash the hens, dry them and dip them in an alcohol bath.

27097_382979041621_707762_n

Then fill the cavity with natron and nestle them in more natron.

27097_382980521621_1744522_n

27097_382980536621_6269956_n29508_388431086621_6460826_n

At first we used the ziplock bags but found it was hard to keep the whole hen covered so we switched to a large Tupperware container.

You need to change the natron a lot at first, like every few days, but after awhile you can go every week or so. You will need to remove the hens, clean off the salts (I read you were suppose to wash them off but I just brushed them off) and add new salts.

After a week or so they looked like this:

29508_388431071621_7587472_n

After about six weeks the hens were ready for their entombment! This is the fun part!

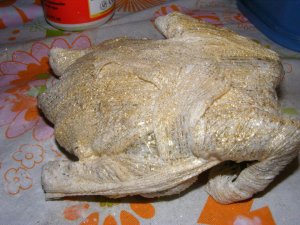
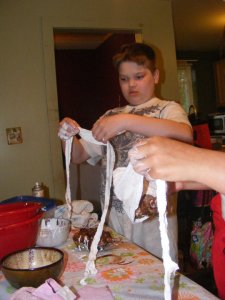
You need to anoint the mummies in spiced oil then wrap them in cotton dipped in glue. I had a bunch of rolled bandages and some mod podge,,,good enough!
29858_398337071621_5977087_n

Here are the results: Queen Cluckopatra and King Bobantatum!

29858_398337726621_4212916_n29858_398337706621_3346648_n

They were then gilded…

29858_398338991621_6352729_n29858_398338421621_180407_n

and entombed.

29858_398338981621_2751679_n29858_398343721621_6372739_n

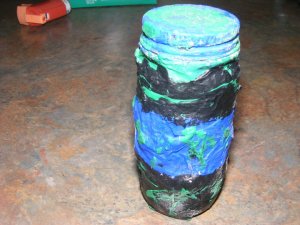
We also preserved some of the internal organs and sored them in canopic jars. You don’t wrap the organs, you fill the jars with oil.
29858_398340561621_1702453_n

The tombs are wipe containers spray painted and then hand painted with acrylics and bejeweled. For the canopic jars were just paper mache and acrylics over ordinary jars (I think this jar was a caper jar). The gilting was spray glitter.

It was fun but it left quite a mess.

29858_398342891621_2225100_n

We made these about 3 1/2 years ago and they still don’t smell. The organs however did. We didn’t keep those.